Ever wondered how to make gaming table that truly elevates your play? This comprehensive guide dives deep into every aspect of crafting your perfect gaming command center. We explore essential planning, material selection, and step-by-step construction to ensure your custom build meets all your gaming needs. Discover expert tips for ergonomic design and integrate vital features like cable management and ambient lighting. From PC setups to console sanctuaries, learn how to build a durable and aesthetically pleasing gaming table. This article helps both beginners and experienced DIY enthusiasts create a functional and stylish space. Get ready to transform your gaming area into a personalized haven for endless hours of immersive gameplay and peak performance. We cover everything you need to know for your next DIY project.
Welcome to the ultimate living FAQ for "how to make gaming table" updated for 2026! Crafting your own gaming station is a fantastic journey, transforming your space into a personalized command center. This comprehensive guide addresses over 50 of the most frequently asked questions, incorporating the latest tips, tricks, and essential knowledge for building a durable and highly functional gaming desk. Whether you're a beginner seeking a robust 'build' or a seasoned DIY enthusiast looking for advanced 'endgame' features, we've got you covered. From material choices to ergonomic setups and cutting-edge customization, discover solutions to common challenges and 'bugs' in the building process. Get ready to elevate your gaming experience with insights designed to make your custom table truly shine.
Planning Your Gaming Table Build
What should I consider before I start building a gaming table?
Before building, consider your budget, available space, type of gaming (PC, console, VR), required surface area for peripherals, and ergonomic needs. Planning these aspects upfront saves time and money, ensuring your custom build meets all your specific demands.
How do I choose the right dimensions for my gaming desk?
Measure your gaming chair's height and your body's ergonomic requirements for comfortable arm and leg room. A standard desk is 29-30 inches tall, but custom height is key. Also, consider monitor size and number to determine optimal depth and width for your setup.
What are common design flaws to avoid in a DIY gaming table?
Avoid neglecting stability, underestimating weight capacity, and poor cable management planning. Also, ensure sufficient ventilation if integrating PC components and use appropriate finishes to protect the surface from wear and tear or liquid spills.
Materials and Tools Explained
What is the best type of wood for a gaming desk?
Plywood, especially Baltic birch or high-grade construction plywood, offers excellent strength and stability for a gaming desk. MDF is a cost-effective option for smooth finishes, while solid hardwood like oak or maple provides superior durability and a premium aesthetic, albeit at a higher cost.
Can I use reclaimed wood for my gaming table project?
Myth vs Reality: Many believe reclaimed wood is always cheaper and easier. Reality: While eco-friendly, reclaimed wood often requires more preparation like sanding, sealing, and pest treatment, which can add significant time and effort. Its unique character can be worth the extra work for a rustic look.
What essential tools do I need to build a gaming table?
You will need a saw (circular, jigsaw, or miter), a drill driver, measuring tape, clamps, safety glasses, and sandpaper. A router can be useful for edge finishing, and a spirit level ensures your table is perfectly flat and stable.
Construction Steps and Techniques
What's the best way to ensure my gaming table is stable?
Use sturdy legs (wood, metal, or cabinet style), robust joinery techniques like screws with wood glue, and cross-bracing for the frame. Ensure the tabletop is securely attached to the base. Over-engineering the support structure prevents wobble and enhances the table's lifespan.
Should I pre-drill holes when assembling my gaming table?
Myth vs Reality: Some think pre-drilling is optional. Reality: Always pre-drill holes when screwing into wood to prevent splitting, especially near edges or with dense materials. It ensures screws drive in smoothly and securely, creating stronger joints for your gaming table.
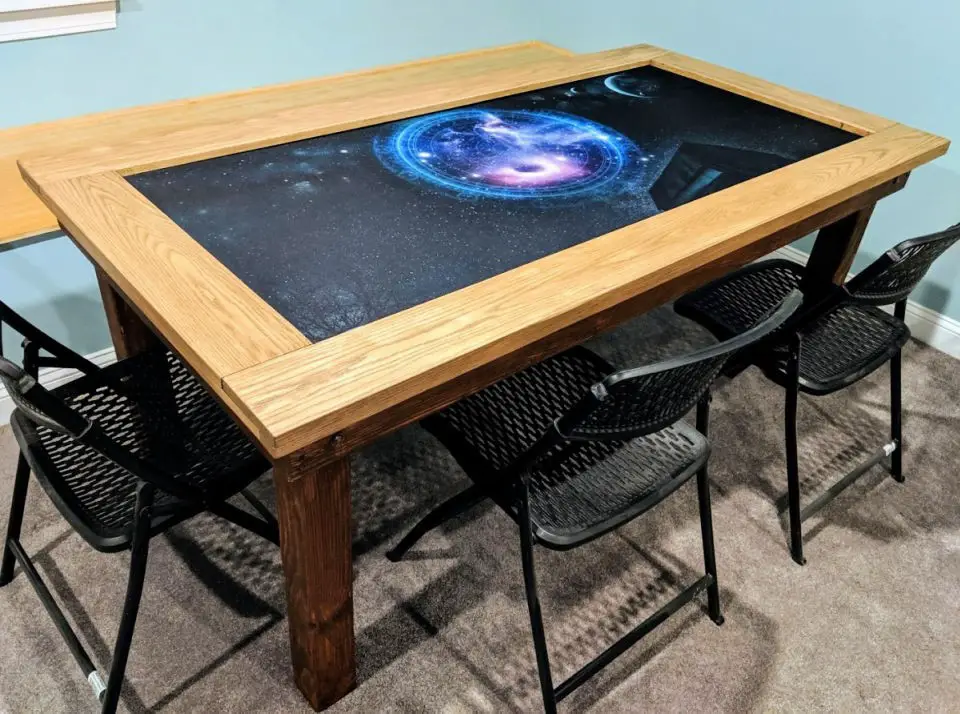
What kind of finish should I apply to my gaming table?
For durability, use a polyurethane or epoxy finish to protect against scratches and spills. Paint can provide a custom color, while a wood stain enhances natural grain. A hard-wearing desk pad also offers extra surface protection and improves mouse glide.
Customization and Ergonomics
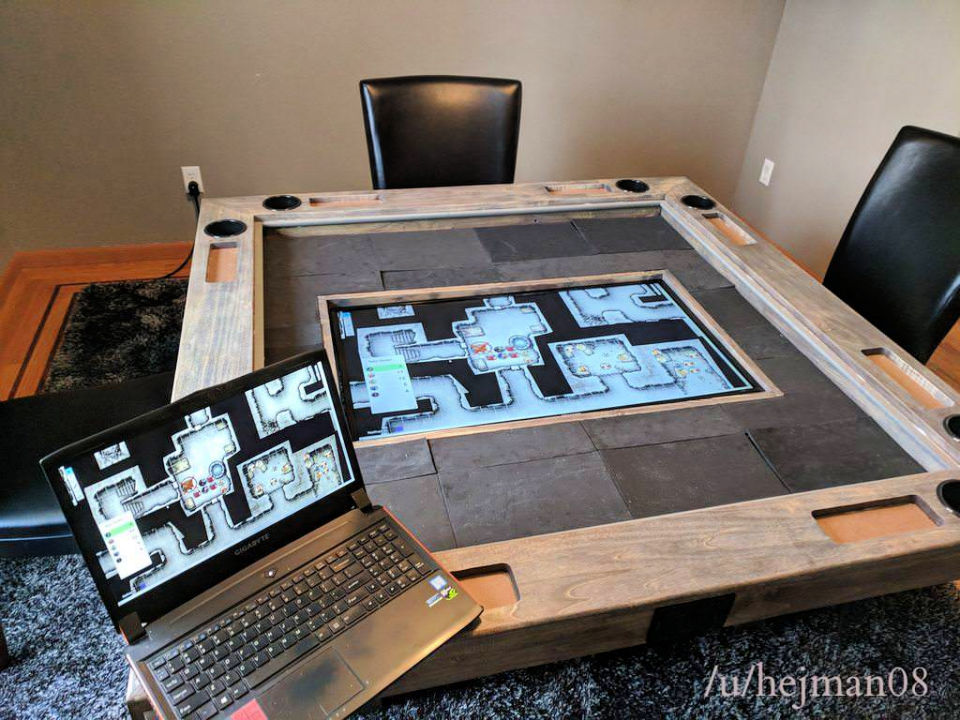
How can I integrate effective cable management into my gaming table?
Plan for cable grommets, adhesive cable clips, and under-desk cable trays during design. Cutouts for monitor arms and power strips can also keep wires tidy. A well-managed setup prevents tangles and improves aesthetics, optimizing your overall gaming experience.
What are good ergonomic features for a custom gaming desk?
Consider an adjustable height mechanism for standing or sitting. Include a monitor arm for flexible display positioning and ensure ample space for a full-sized keyboard and mouse. A comfortable wrist rest can also reduce strain during extended play.
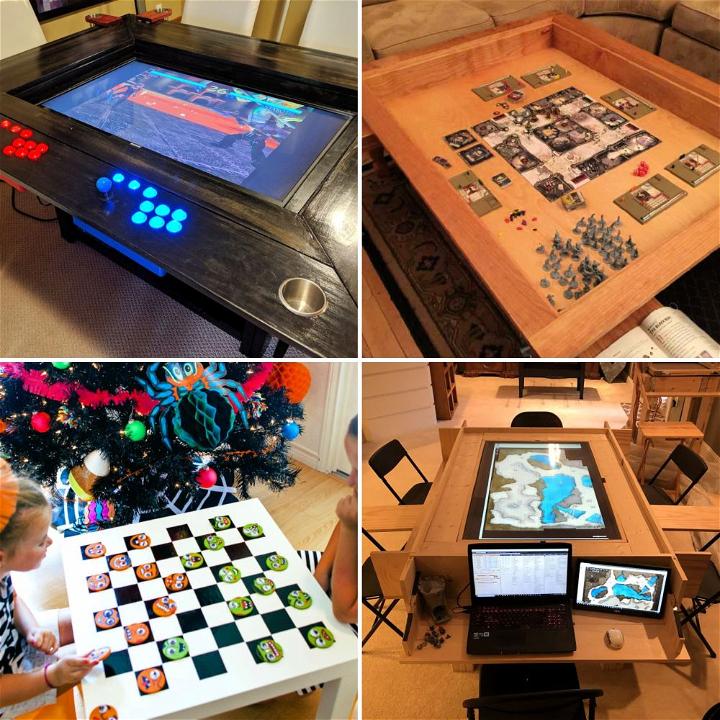
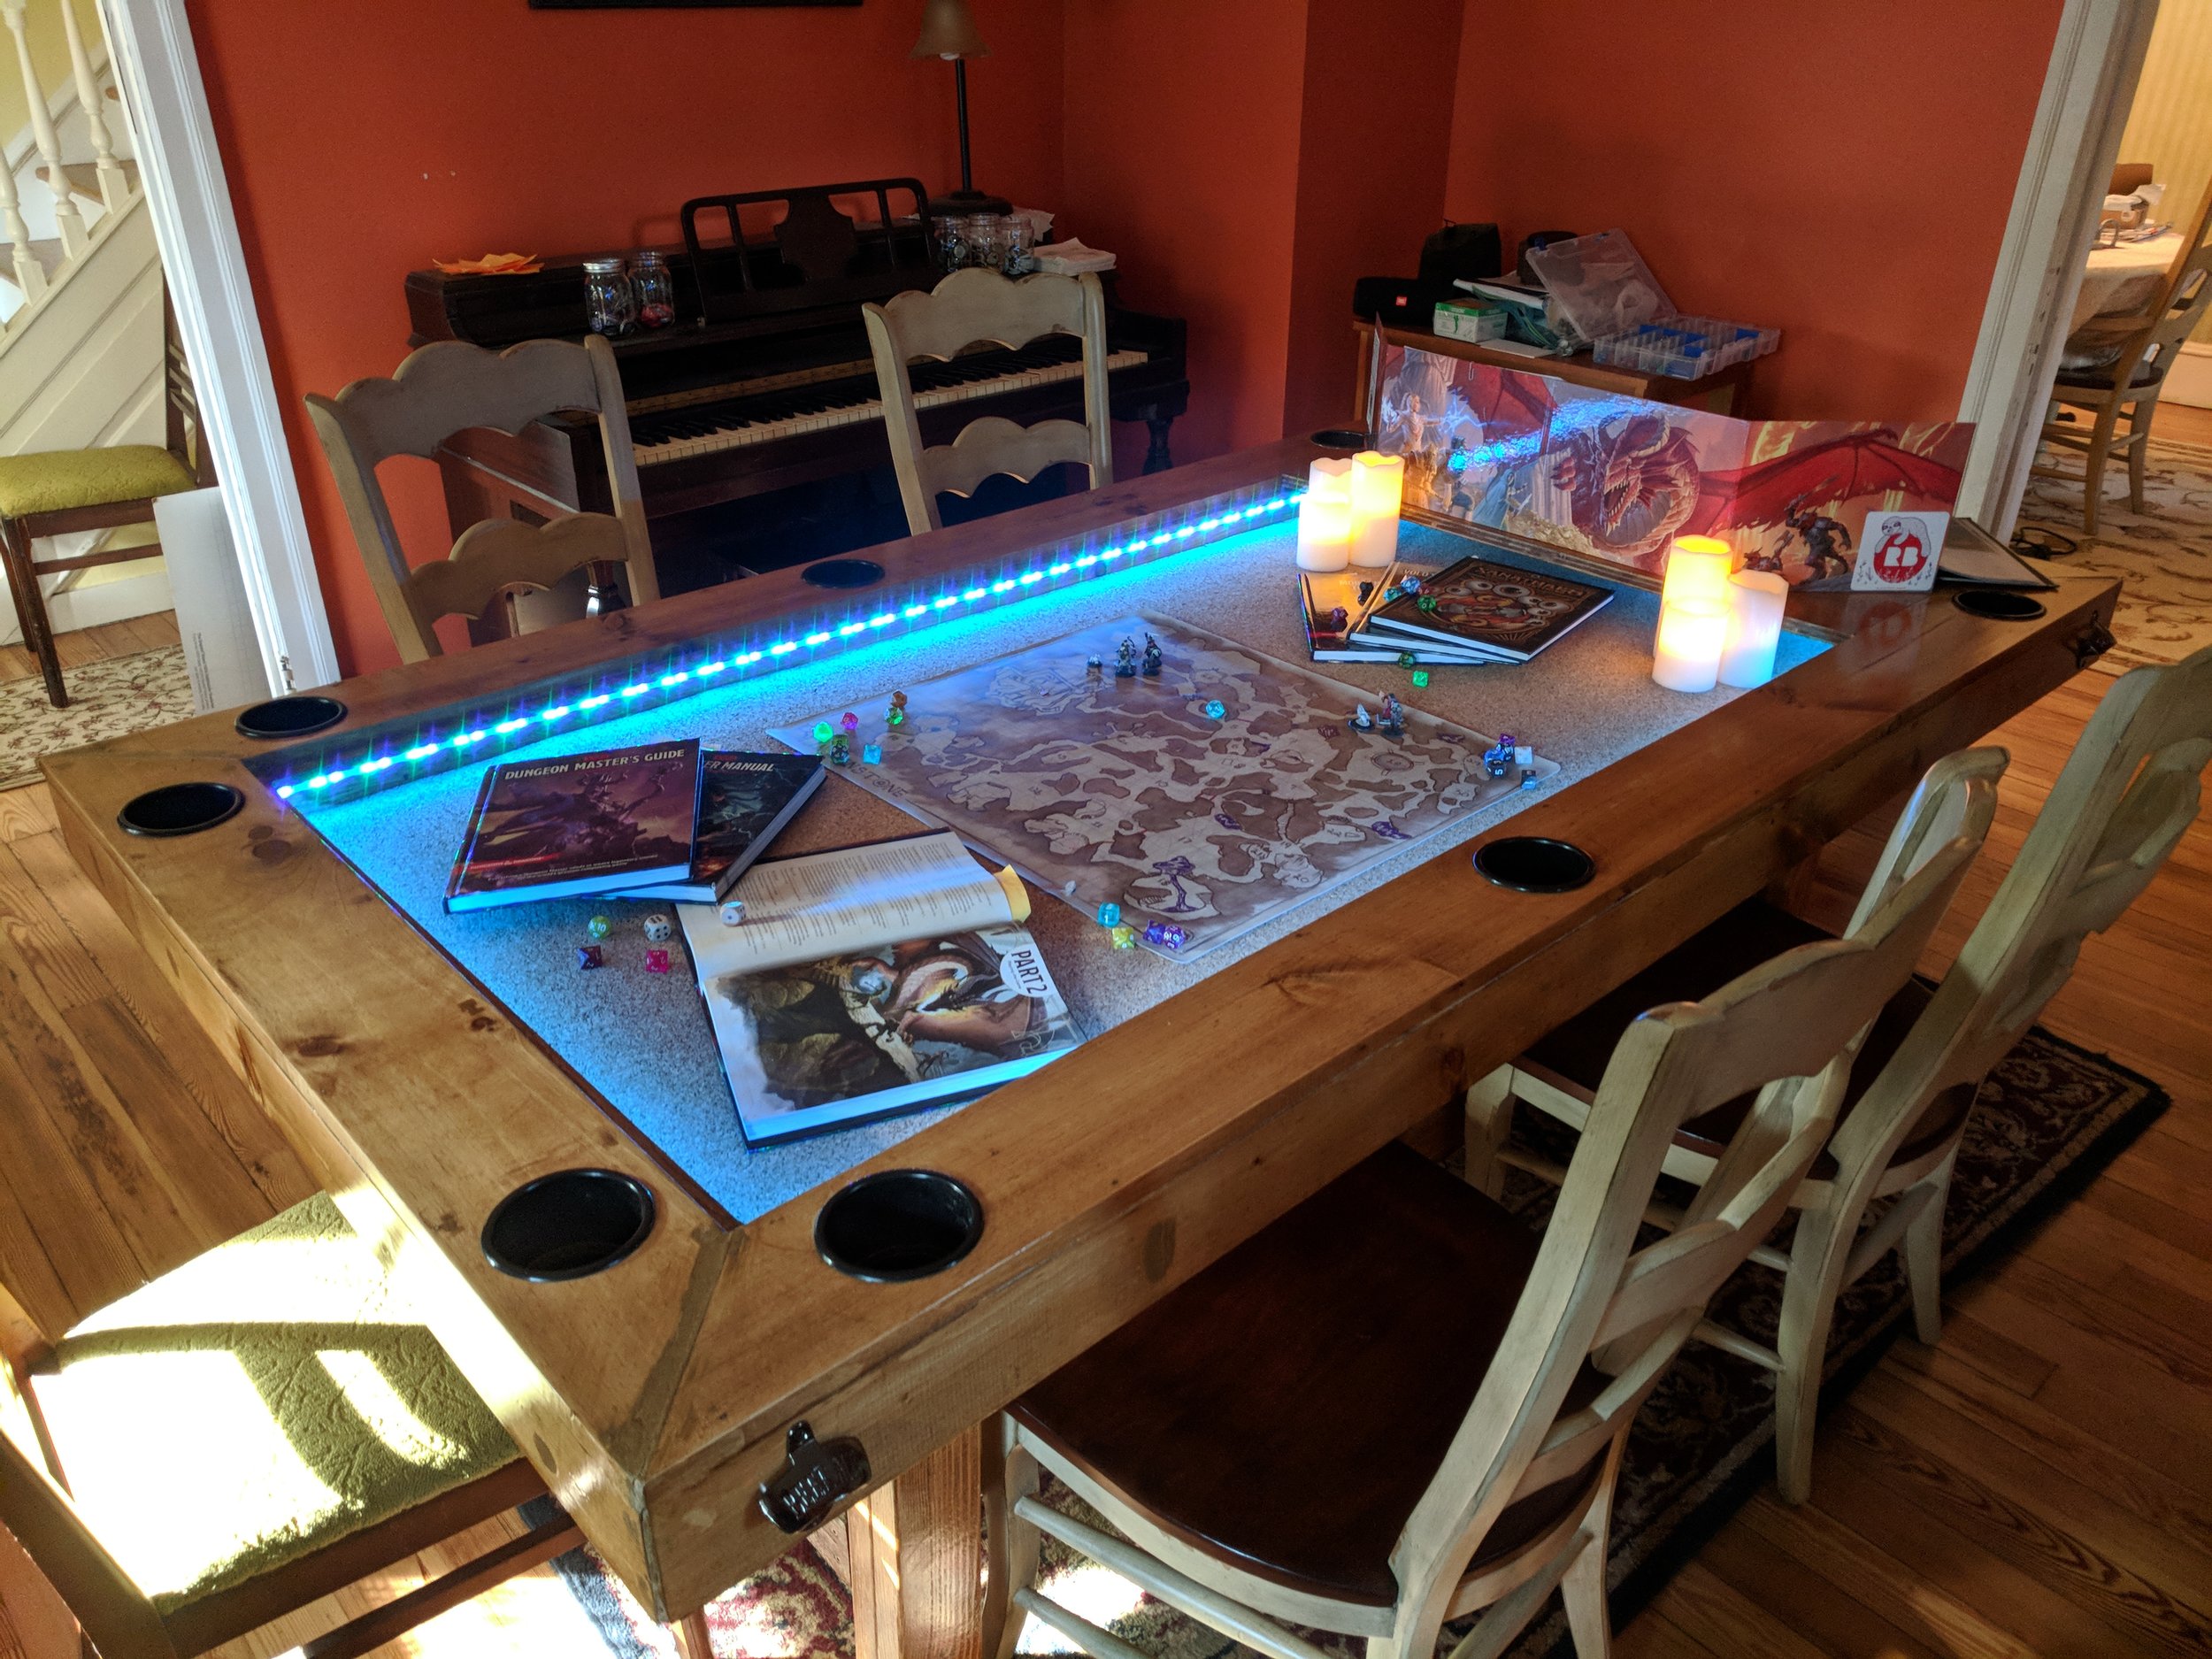
Is it worth adding RGB lighting to my DIY gaming table?
Yes, RGB lighting adds significant aesthetic value and can enhance immersion, especially in a themed gaming room. LED strips are relatively inexpensive and easy to install, offering customizable colors and effects to match your setup or game mood.
Budget and Maintenance
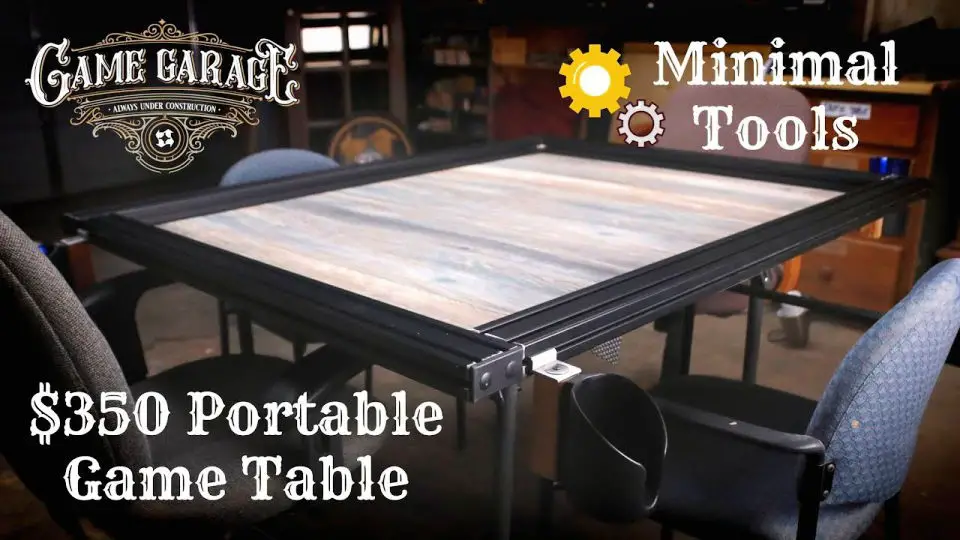
How can I build a gaming table on a tight budget?
Utilize common construction lumber like 2x4s for the frame and inexpensive plywood or laminated particle board for the top. repurpose old furniture legs or materials. Keep the design simple and focus on core functionality. DIY can significantly reduce costs compared to buying pre-made.
How do I maintain my wooden gaming table?
Regularly dust your table with a soft cloth. Use coasters for drinks to prevent water rings and wipe up spills immediately. Apply wood wax or polish periodically to protect the finish and keep the wood nourished. Avoid harsh chemical cleaners that could damage the surface.
What is the typical lifespan of a DIY gaming table?
Myth vs Reality: Some fear DIY tables are less durable. Reality: A well-built DIY gaming table, constructed with quality materials and proper techniques, can easily last 10-15 years or more. Its lifespan often exceeds that of many mass-produced desks due to superior material choice and attention to detail.
Still have questions?
If you're still wondering about specific 'builds' or 'bugs' in your DIY journey, explore our other guides on advanced gaming room setups and component integration!
Ever dreamt of a gaming setup so perfectly tailored it feels like an extension of yourself? Have you asked yourself how to make gaming table that truly stands out from the generic, mass-produced options? Many gamers constantly search for that ideal battle station, often encountering issues like poor ergonomics, tangled cables, or insufficient space. Building your own gaming table not only solves these common pain points but also allows for unparalleled customization, giving you a distinct advantage and a more immersive experience. This guide will walk you through everything, transforming your vision into a reality.
We will delve into the precise steps and crucial considerations for constructing a gaming table designed just for you. From selecting the right materials to integrating smart features, you will gain the knowledge to create a durable and highly functional gaming hub. Our insights aim to elevate your DIY skills, ensuring your custom table supports hours of intense FPS battles, intricate MOBA strategies, epic RPG adventures, or even casual Indie game sessions. Get ready to embark on a rewarding project that promises both peak performance and personal satisfaction in your gaming space.
Crafting Your Ultimate Gaming Table Blueprint
Planning your custom gaming table is arguably the most crucial step in the entire building process. You must carefully consider your specific gaming style and hardware requirements before cutting any wood. Are you a dedicated PC gamer needing ample space for multiple monitors and a mechanical keyboard, or do you primarily use a console like a PS5 or Xbox Series X? Each setup demands different dimensions and features for optimal comfort and utility. Thinking ahead prevents costly mistakes and ensures your final product perfectly suits your needs, making your gaming experience truly seamless and enjoyable.
Defining Your Gaming Needs for Table Design
Before you even think about buying materials, ask yourself what kind of gamer you are. Do you spend hours immersed in complex MMO worlds, or are you a speedrun enthusiast who needs quick access to every peripheral? Your play style directly influences the necessary surface area, height, and integrated features for your how to make gaming table project. A competitive FPS player might prioritize a vast mouse pad area and monitor stability, while a VR enthusiast needs open space for movement. Consider future upgrades too, as technology evolves rapidly, ensuring your table remains relevant.
Measuring Up: Ergonomics and Space Planning
Ergonomics are paramount for long gaming sessions, preventing discomfort and potential injury. Measure your ideal chair height and arm reach to determine the perfect table height and depth for your how to make gaming table build. Ensure sufficient legroom and monitor distance to reduce eye strain, which is crucial for maintaining focus during intense gameplay. Think about the overall room dimensions, ensuring the table fits comfortably without obstructing movement or other furniture. Planning for accessibility and comfort from the outset guarantees a truly enjoyable setup.
Gathering Materials and Essential Tools for Your Build
With a clear plan in hand, it is time to collect the necessary materials and tools for your custom gaming table. Selecting durable and high-quality components will ensure your table withstands years of heavy use and remains stable under the weight of your gaming gear. Opting for the right tools also simplifies the construction process significantly, making the project more manageable and enjoyable. Remember, a solid foundation requires strong materials and precise execution, so do not cut corners on these vital aspects.
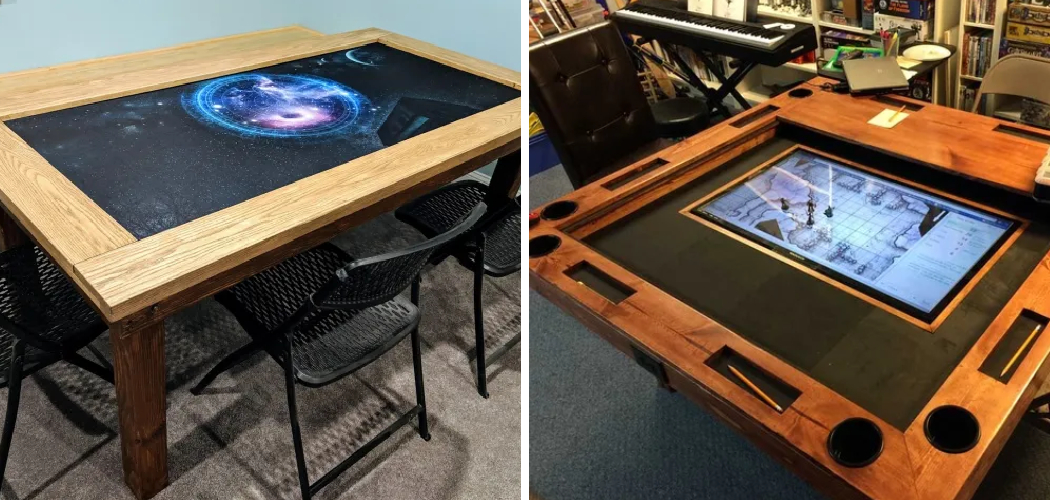
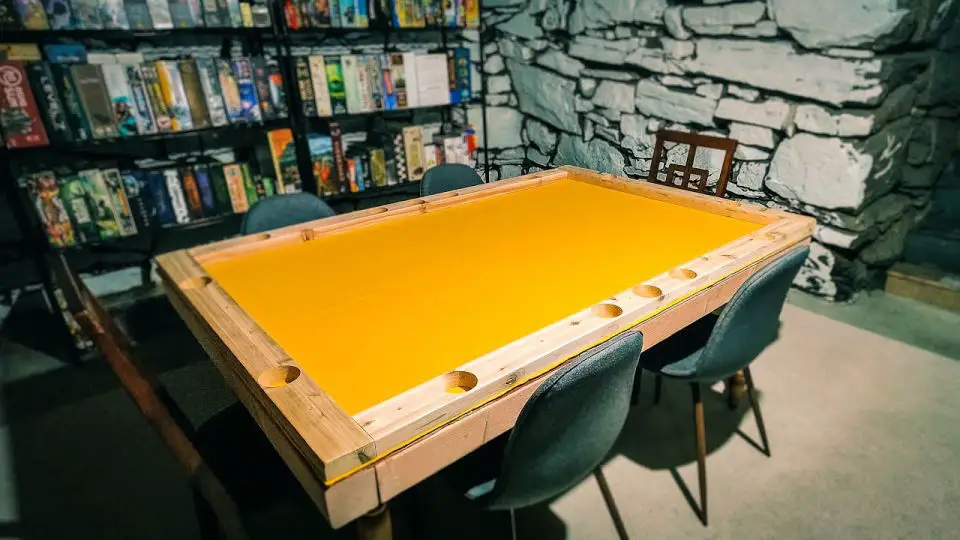
Choosing the Right Materials for Durability and Style
Plywood, MDF, and solid wood are popular choices, each offering distinct advantages for your how to make gaming table. Plywood provides excellent strength and versatility, while MDF offers a smooth finish ideal for painting. Solid wood, though pricier, delivers superior durability and a premium aesthetic. Consider the finish carefully; a smooth, low-friction surface is great for gaming mouse precision. Think about edge banding or protective coatings to prevent wear and tear. Your material choice impacts both the longevity and appearance of your gaming table.
Must-Have Tools for a Smooth Construction Process
Having the correct tools makes all the difference when tackling a DIY project like building a gaming table. A reliable circular saw or jigsaw is essential for precise cuts, while a drill driver is indispensable for assembly. Do not forget measuring tapes, clamps, and safety goggles to ensure accuracy and personal protection. Sandpaper and a router can help achieve professional-looking edges and finishes. Investing in good quality tools saves time and frustration, leading to a much better final product for your gaming haven.
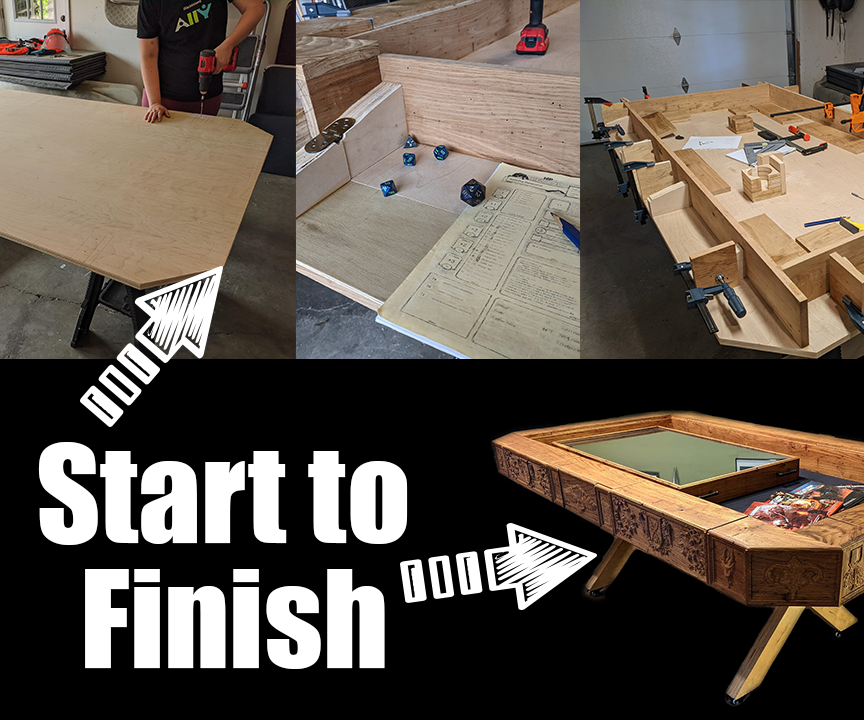
Step-by-Step Construction: Building Your Gaming Table
Now that you have your design and materials, it is time to bring your gaming table to life. Following a systematic approach ensures structural integrity and a clean finish. Each step builds upon the last, so taking your time and being meticulous will yield the best results. This section breaks down the construction process into manageable parts, guiding you from raw materials to a fully assembled gaming desk ready for action.
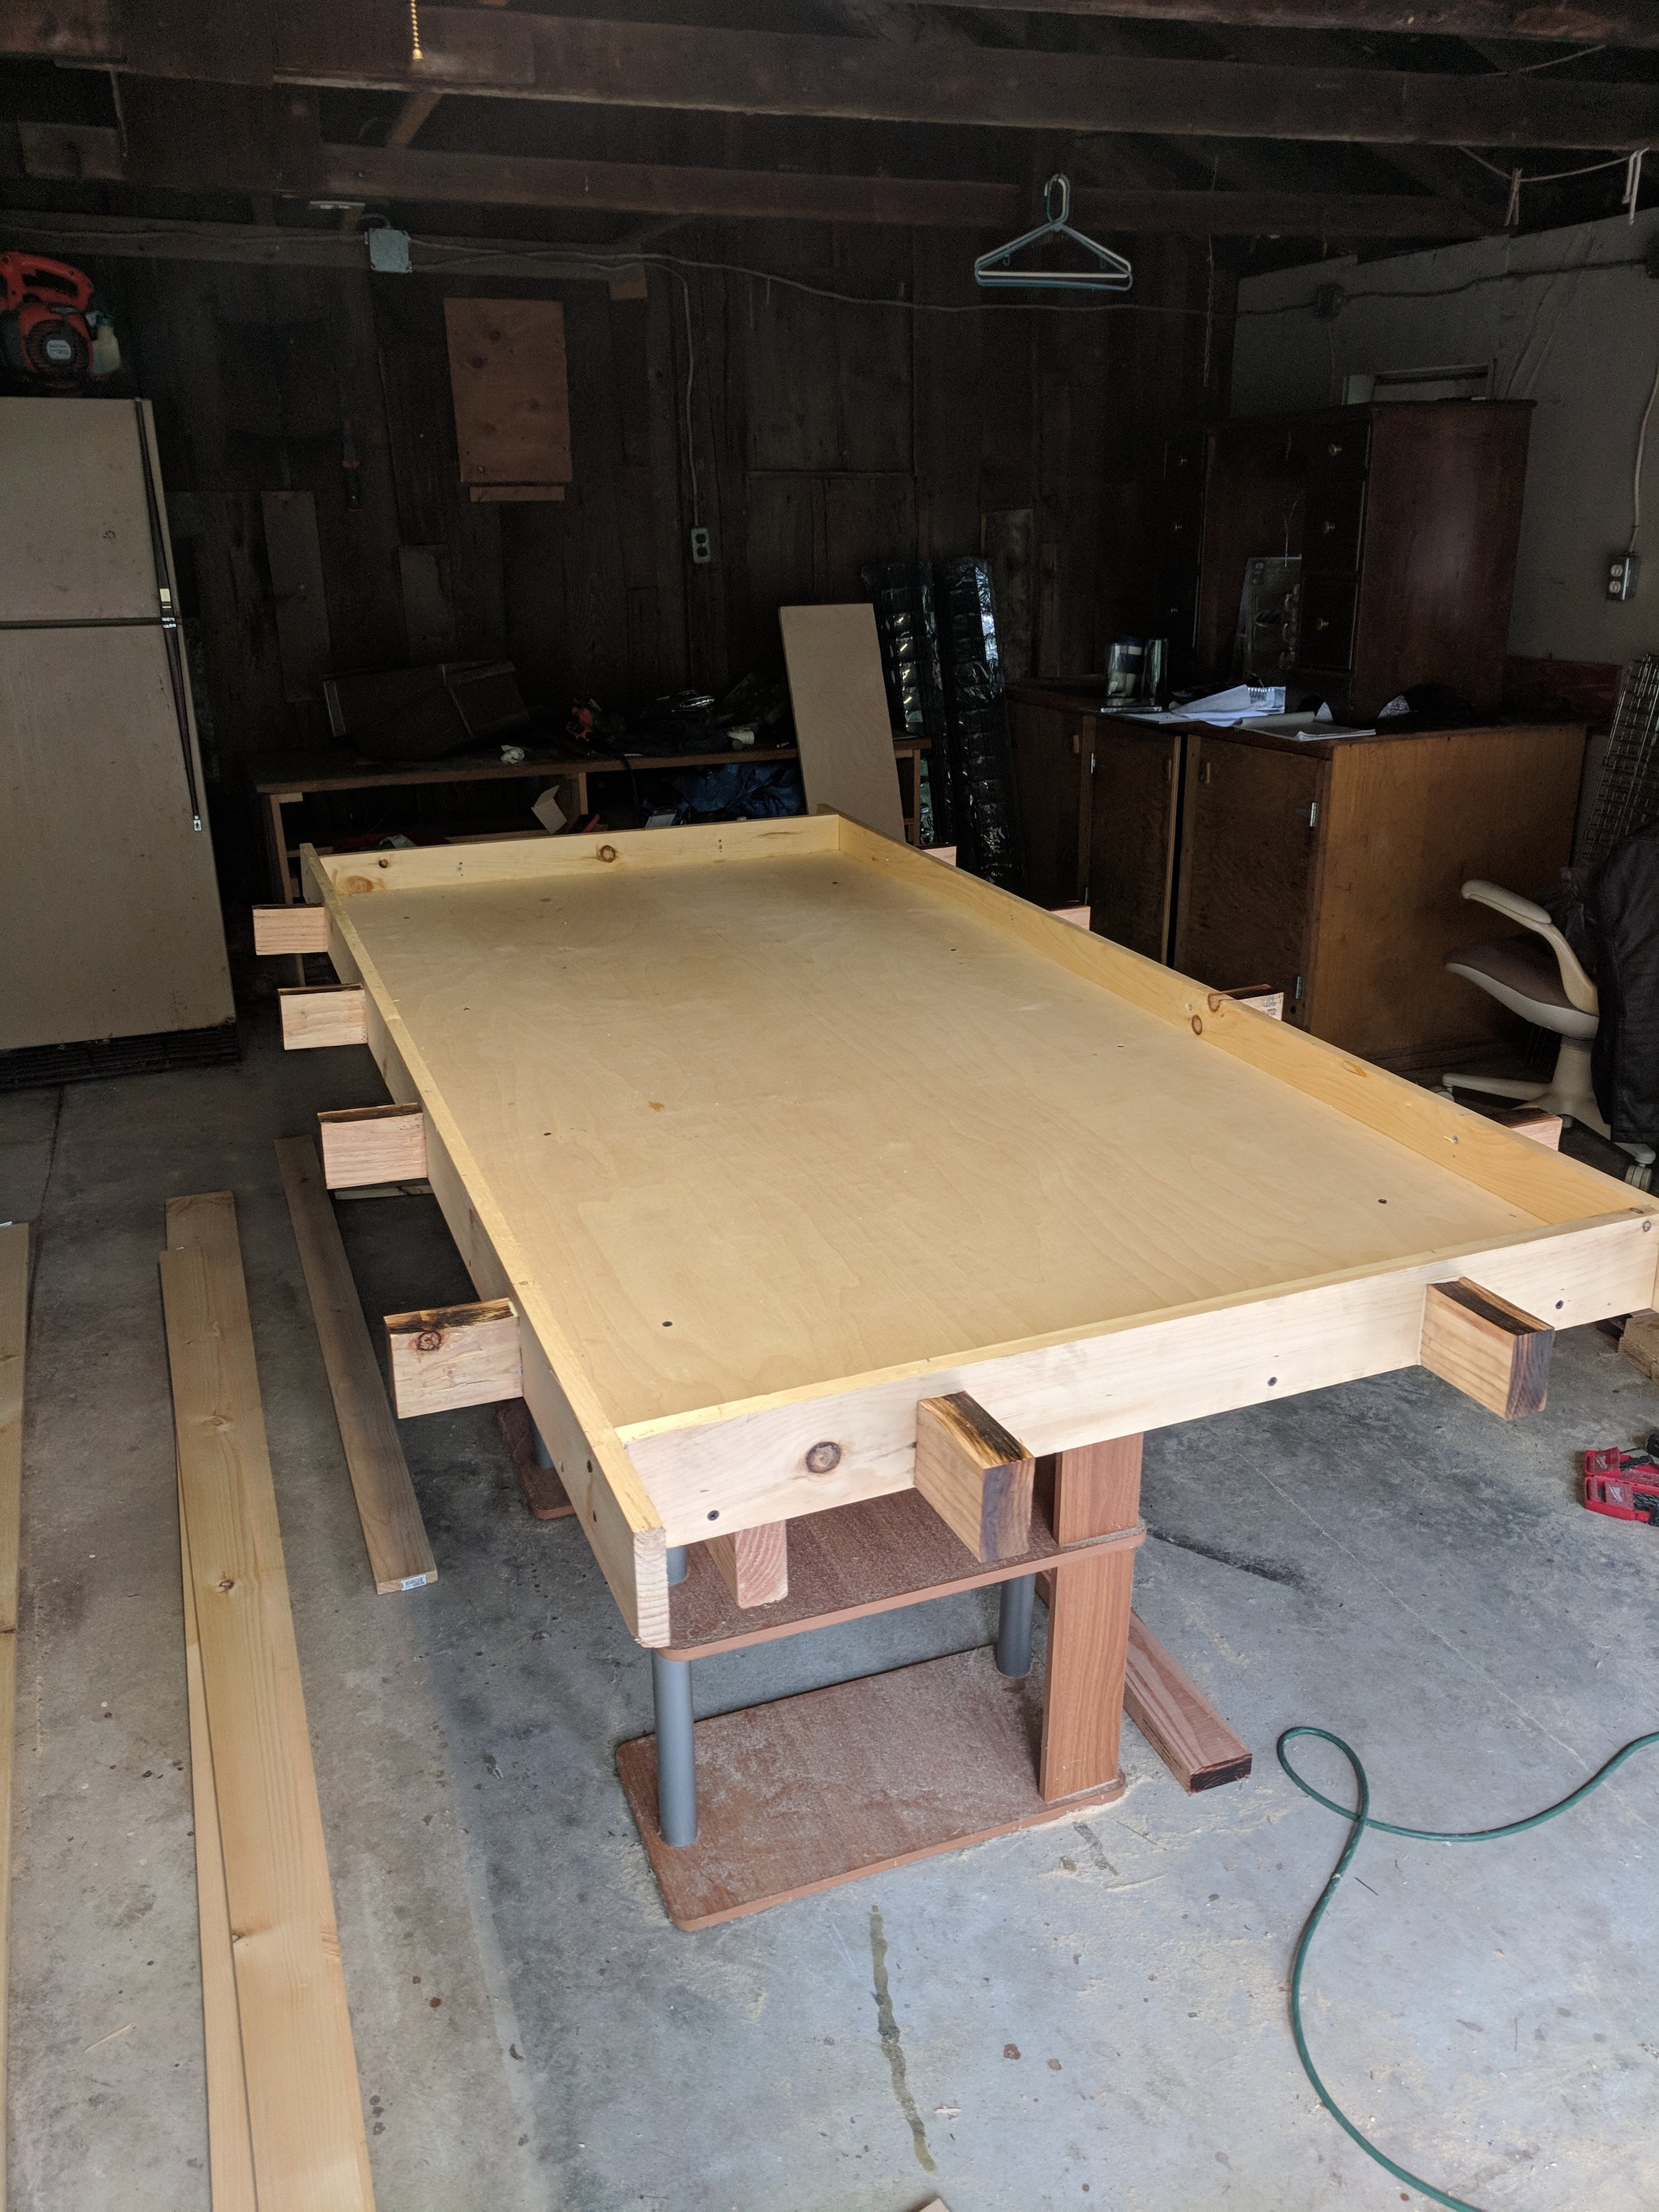
Cutting and Assembling the Framework for Stability
Begin by accurately cutting all your wooden pieces according to your detailed plans for your how to make gaming table. Precision here is key, so double-check all measurements before making any cuts. Once cut, assemble the main framework using wood glue and screws, ensuring all joints are secure and square. This initial frame forms the backbone of your table, providing the essential stability required to support heavy monitors and intense gaming. A strong frame prevents wobble and enhances the overall durability of your custom desk.
Attaching the Tabletop and Finishing Touches
With the framework complete, carefully attach your chosen tabletop material using screws from underneath, creating a seamless surface. Once the tabletop is secure, it is time for sanding, filling any imperfections, and applying your desired finish. This could be paint, stain, or a protective sealant, depending on your aesthetic preferences. These finishing touches not only enhance the table's appearance but also protect it from spills and scratches, ensuring it looks great for years. A well-finished table feels professional and inviting.
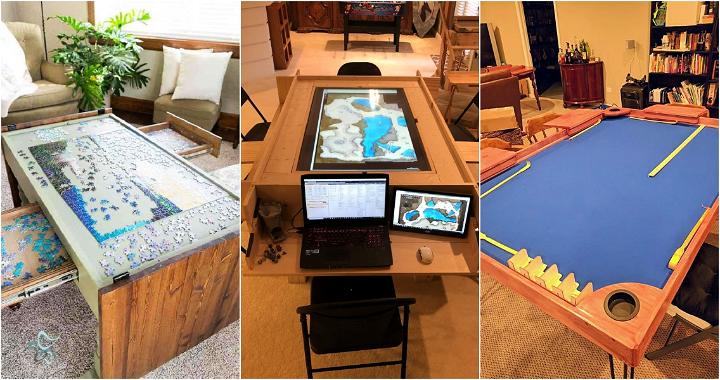
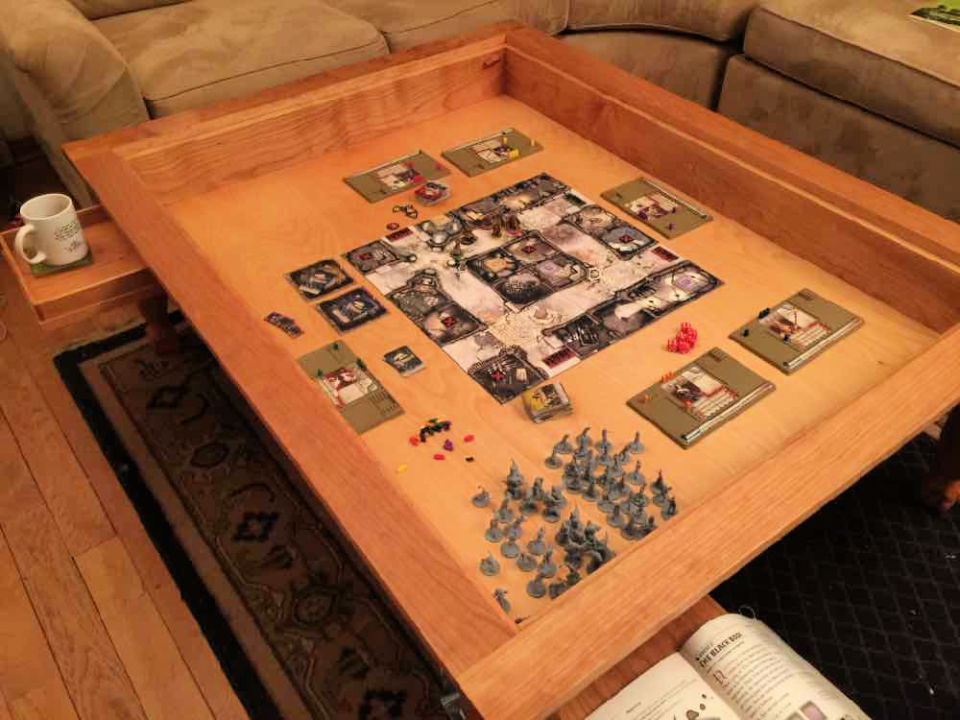
Customizing Your Gaming Hub: Beyond the Basics
The real magic of building your own gaming table lies in the customization options. This is where you truly make it yours, integrating features that enhance both functionality and aesthetics. From sophisticated cable management systems to vibrant RGB lighting, these additions transform a simple desk into a personalized command center. Think about how these custom elements can improve your gaming experience, making it more efficient, comfortable, and visually striking.
Integrating Smart Cable Management Solutions
Tangled cables are a gamer's nightmare, leading to frustration and an untidy setup. Incorporate cable trays, grommets, and routing channels into your how to make gaming table design to keep wires neatly organized and out of sight. Magnetic cable clips or reusable ties can also help manage peripheral cords effectively. A clean cable setup not only looks professional but also prevents accidental disconnections and improves airflow around your PC, potentially aiding in 'settings optimization' by reducing dust buildup and maintaining stable temperatures.
Adding Ambient Lighting for Immersion and Style
RGB lighting has become a staple in modern gaming setups, adding a dynamic flair and enhancing immersion. Install LED strips along the edges or underneath your gaming table to create captivating ambient effects. Many LED kits offer app control, allowing you to synchronize lighting with your games or change colors to match your mood. Strategic lighting can reduce eye strain in dark rooms and elevate the overall aesthetic of your battle station, making every session feel more epic.
What Others Are Asking?
Curious about common questions people have when trying to figure out how to make gaming table? We have compiled some of the top queries from search engines. These answers provide quick, factual insights to help you navigate your DIY project. Let us dive into what other aspiring table builders are asking about.
How deep should a gaming desk be for PC?
A gaming desk for a PC setup should ideally be at least 25-30 inches deep. This depth provides ample space for your monitor(s) at a comfortable viewing distance, your keyboard, and your gaming mouse. It also allows for good elbow support, enhancing ergonomics and reducing strain during long gaming sessions, which helps prevent issues like 'FPS drop' due to discomfort.
What is the best material to build a gaming desk?
The best material to build a gaming desk often depends on budget and desired aesthetic. Plywood or MDF are excellent, cost-effective choices for their strength and smooth surfaces, especially when laminated or painted. Solid wood offers superior durability and a premium look, though at a higher cost. A combination can provide benefits of both.
How tall should a gaming desk be?
A standard gaming desk height is typically around 29-30 inches (73-76 cm). However, the ideal height is highly personal and depends on your own height and the ergonomic setup of your chair. An adjustable standing desk frame can offer the most flexibility, allowing you to fine-tune the height for optimal comfort and posture.
Can I use a regular table as a gaming desk?
Yes, you can certainly use a regular table as a gaming desk, especially for 'beginner' setups. However, a dedicated gaming table or a DIY build offers superior ergonomics, better cable management options, and increased surface area for peripherals. Regular tables might lack the stability or space needed for a full 'pro' gaming setup over time.
Is MDF good for a gaming desk?
MDF (Medium-Density Fiberboard) is a good option for a gaming desk, particularly for its smooth surface, affordability, and ease of customization. It takes paint well and is quite dense, offering decent stability. However, it is susceptible to moisture damage and can be heavy, requiring proper sealing and careful handling during construction.
How much does it cost to build a custom gaming desk?
Building a custom gaming desk can vary widely in cost, typically ranging from $100 for a basic, minimalist setup using economical materials to over $500 for a feature-rich, high-end design with premium wood and integrated tech. The overall cost significantly depends on your chosen materials, desired features, and tools you already own.
Advanced Tips for a Professional Gaming Table
If you are aiming for a truly 'pro' level gaming table, consider incorporating some advanced features and construction techniques. These tips go beyond the basics, focusing on optimizing your setup for peak performance and longevity. Think about elements that enhance functionality, simplify maintenance, and provide a competitive edge. Even small details can significantly impact your overall gaming experience, preventing issues like 'stuttering fix' due to a poorly organized setup.
Ergonomic Enhancements and Monitor Mounting
For the ultimate ergonomic experience, consider a VESA-compatible monitor arm setup instead of standard monitor stands. These allow for precise height, tilt, and swivel adjustments, optimizing your viewing angle and freeing up valuable desktop space. You can even use a 'dual monitor' or 'triple monitor' setup for enhanced multitasking or an expansive view in 'Battle Royale' games. Proper monitor placement is critical for comfort and reducing neck strain during long play sessions.
Power Management and Integrated USB Hubs
A true gaming table integrates power solutions seamlessly. Install recessed power strips or a dedicated power grommet to keep outlets easily accessible and neatly concealed. Integrating USB hubs directly into the tabletop provides convenient charging ports for your phone, controller, or other accessories. This prevents unsightly power bricks and makes managing multiple devices much simpler, contributing to a cleaner, more efficient 'settings optimization' for your entire gaming area.
Future-Proofing Your Gaming Table Design
When designing your custom gaming table, think about future needs and potential upgrades. Can it easily accommodate a larger monitor, a different PC case, or new peripherals like a 'VR' headset? Modular components or adjustable features can make your table adaptable to evolving technology. Consider building in extra space or removable panels for easier access to components, ensuring your table remains relevant and functional for years to come. This foresight prevents needing a complete rebuild later on.
Common Mistakes to Avoid in Your Gaming Table Build
Even with the best intentions, DIY projects can encounter pitfalls. Knowing common mistakes beforehand can help you avoid frustration and ensure a smoother build process for your how to make gaming table. From inaccurate measurements to neglecting stability, these errors can impact the functionality and lifespan of your custom desk. Paying attention to these areas will save you time, effort, and potentially money in the long run, ensuring your gaming table is a success.
Underestimating the Importance of Stability and Weight Capacity
One of the biggest mistakes is failing to account for the weight your gaming table will bear. Multiple monitors, a heavy PC tower, and peripherals add up quickly. Use sturdy legs and reinforce joints to prevent wobble or eventual collapse. A flimsy table can lead to frustrating 'FPS drop' if your equipment shifts or vibrates. Always err on the side of over-engineering the support structure for peace of mind and safety.
Neglecting Cable Management During Construction
Many builders only think about cable management after the table is complete, leading to awkward, unsightly solutions. Integrate cable routing channels, holes, or trays into your design from the very beginning. Planning for cables during the cutting and assembly phases makes the process much more effective and cleaner. Proper management keeps your setup tidy, improves airflow, and makes cleaning easier, preventing future 'lag' from disorganized setups.
Final Thoughts and The Future of Your Gaming Space
Building your own gaming table is a deeply rewarding project that offers unparalleled customization and ergonomic benefits. You have learned how to make gaming table that truly reflects your unique gaming style and hardware. From initial planning and material selection to advanced customization and avoiding common mistakes, this guide provides a comprehensive 'walkthrough' for creating your ideal gaming hub. Remember, your gaming space is an extension of your passion, so invest the time and effort to make it truly exceptional.
As gaming continues to evolve with new technologies like cloud gaming and advanced VR setups, your custom table can adapt with it. With a solid, well-planned foundation, you are ready for anything the future of gaming throws your way. Enjoy your new, optimized gaming sanctuary, where every 'WASD' movement feels perfect and every 'gaming mouse' click is precise. Happy building, and may your 'ping' always be low and your 'FPS' always high!
Key Highlights of Your Gaming Table Build
- Codes and channels for impeccable cable management.
- Tips for selecting cost-effective yet durable materials like plywood.
- Pros: tailored ergonomics, unique aesthetic, and maximum efficiency.
- Cons: requires time commitment, basic DIY skills, and initial material cost.
- Achieve optimal 'settings optimization' through a well-organized desk.
- Prevent 'FPS drop' and 'stuttering fix' frustrations with a stable setup.
- Embrace 'beginner' friendly steps while allowing for 'pro' level upgrades.
Codes to organize wiring effectively and efficiently. Tips for choosing durable, affordable materials. Pros include custom ergonomics and aesthetics. Cons involve time commitment and initial cost. Design for various gaming setups (PC, console, VR). Optimal height and surface area for comfort. Integrated lighting enhances immersion. Cable management ensures a clean look. Build process guides from scratch. Future-proof design considerations.
35:strip_icc()/pic2606212.jpg)


How To Build A Gaming Table Step By Step Holtid Blog Pic2606212 . Gaming Table 9 Steps With Pictures . 20 Free DIY Gaming Table Plans With PDF Blitsy Free Diy Gaming Table Plans With Pdf . DIY Gaming Table . Diy Gaming Table
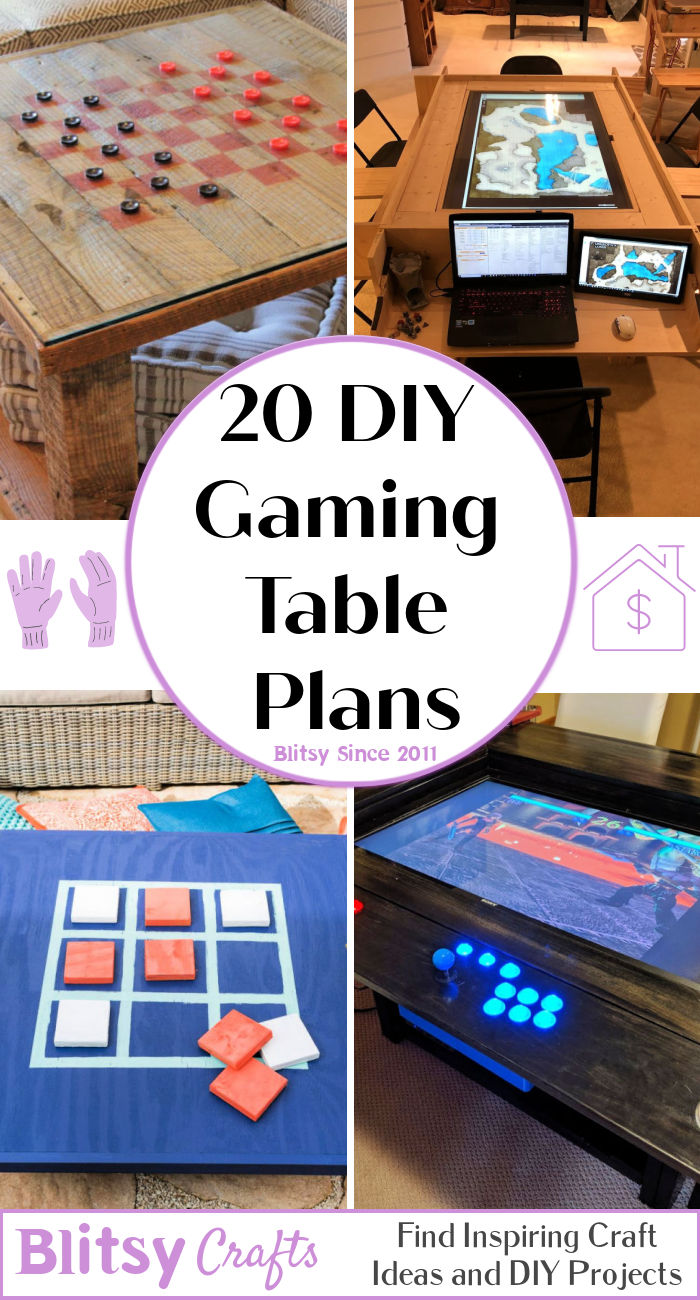

20 Free DIY Gaming Table Plans With PDF Blitsy Build Your Own Gaming Table . 20 Free DIY Gaming Table Plans With PDF Blitsy 20 DIY Gaming Table Plans . 20 Free DIY Gaming Table Plans With PDF Blitsy DIY Gaming Table Plans . 20 Free DIY Gaming Table Plans With PDF Blitsy Build Your Own DD Table . Building The Ultimate Gaming Table Screen Shot 2015 12 13 At 7.57.32 Am


How To Build Gaming Table 10 Easy Steps 2026 How To Build Gaming Table . 20 Free Diy Gaming Table Plans With Pdf L Compress . Easy Build Gaming Table At Doreen Woods Blog Image Asset . DIY 40 Gaming Table Plans . How To Build It Custom Gaming Table Idiot Tantrum IMG 20180716 182212

How To Build It Custom Gaming Table Idiot Tantrum IMG 20180812 175829 . How To Build It Custom Gaming Table Idiot Tantrum IMG 20180812 175958 . 25 Cheap Diy Gaming Table Plans Anyone Can Make Diy Folly Compress . 25 Cheap Diy Gaming Table Plans Anyone Can Make Diy Folly Compress . 25 Cheap Diy Gaming Table Plans Anyone Can Make Diy Folly Compress

25 Cheap Diy Gaming Table Plans Anyone Can Make Diy Folly Compress . 25 Cheap Diy Gaming Table Plans Anyone Can Make Diy Folly Compress . 25 Cheap Diy Gaming Table Plans Anyone Can Make Diy Folly Compress . 25 Cheap Diy Gaming Table Plans Anyone Can Make Diy Folly Compress . 25 Cheap Diy Gaming Table Plans Anyone Can Make Diy Folly Compress

:strip_icc()/pic2606217.jpg)
25 Cheap Diy Gaming Table Plans Anyone Can Make Diy Folly Compress . 25 Cheap Diy Gaming Table Plans Anyone Can Make Diy Folly Compress . 25 Cheap Diy Gaming Table Plans Anyone Can Make Diy Folly Compress . 25 Cheap Diy Gaming Table Plans Anyone Can Make Diy Folly Compress . How To Build A Gaming Table Step By Step Holtid Blog Pic2606217


Make Your Own Gaming Table With Built In Game Storage Artofit . 28 Diy Gaming Table Plans For Every Gaming Enthusiast Artofit . 28 Diy Gaming Table Plans For Every Gaming Enthusiast Artofit . Best 13 20 Free DIY Gaming Table Plans With PDF Artofit. Build A Gaming Table For 150 Table